ArtWonk graphics uses a flexible multi image compositing and display system based on the Canvas (the main draw area), which you can display or hide with the "C" button on the Panel Toolbar, plus 4 additional Screens which can also display images and can be shown or hidden with the four ("1" to "4") buttons on the Toolbar next to the Canvas button. Additionally, there can be any number of active undisplayed images, called Buffers, that can be used for virtually unlimited processing and merging of your images.
Conceptually, the Canvas is for drawing and displaying images, Buffers are for drawing and compositing images prior to displaying them, and the Screens are for displaying images from either buffers or from image files.
The Canvas is actually a combination Screen and Buffer, with automatic updating. When you are ready to explore the multi image capability ArtWonk offers, see the Buffers section. Until then, since graphics modules use the Canvas by default, you can safely ignore modules in the Buffers section and still have access to the wide palette of graphics drawing and processing modules ArtWonk offers.
You can right click on any of the display screens to change screen resolution, and to erase, copy and paste the image. These functions are also available programmatically from the modules.
Flood Canvas Frame LoadPic SavePic ViewCtrl ViewNote Symmetry BoxWithin PlayMP3
FillStyle DrawWidth DrawMode Font Turtle LineAngle
Text Dot Line LineTo Box RoundRect Triangle QuadPoly Pentagon Hexagon Circle Ellipse Arc Wedge Curve
Blend Brightness AContrast Contrast Parabolic Equalize Gamma Blur MBlur Diffuse Erode Mosaic Posterize Solarize Noise Dilate Emboss Outline Soften Sharpen Buttonize
SetArea Region Flip Mirror Rotate Crop Resize Perspective Pinch PWarp Ripple Swirl Twist AdjustColor ReplaceColrs Negative Median Despeckle Matrix Merge
Screen Buffer BufInfo BufArray ActiveBuf SizeBuf LoadBuf BufGetCrop SizeTile
Modules of a general nature such as for erasing, loading and saving images; and miscellaneous other graphics modules.
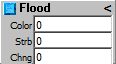
Flood image with given color. This module erases to the (background) color you specify.
Outputs: (none)
Inputs:
Color: Flood color (&hBBGGRR).
Strb: Strobe to update.
Chng: Any change to update.
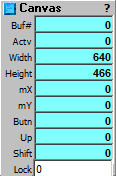
Buffer access and mouse activity for the primary ("C" button) display screen. This module is not needed to create the Canvas, or connect a Buffer to it - that is always done and is automatic - however it is useful for accessing size, activity and mouse-over information, and for locking the Canvas screen so you can use the Mouse for custom interaction with it.
Outputs:
Buf#: Canvas Buffer handle (usually 0).
Actv: Indicates whether graphics modules can write to the Canvas. 1=Active, 0=Inactive. If you are using more Buffers than the one default Canvas Buffer, place an ActiveBuf module in the module calculation priority order just before before the Canvas module, then follow it with the graphics modules you want to operate on it, then another ActiveBuf module and Buffer module and whatever graphis modules you want to operate on that Buffer, etc. The Activ flag in the Canvas or the Buffers will indicate when the module is able to receive the graphics operations. Mostly used for debugging, but you can also use it to inform other modules.
Width: Canvas width in pixels.
Height: Canvas height in pixels.
mX: Mouse X when over screen and Lock=NZ.
mY: Mouse Y when over screen and Lock=NZ.
Butn: Mouse Button pressed, 1=Left, 2=Right 4=Middle (Lock NZ).
Up: Mouse Button up (Lock NZ).
Shift: Shift keys when Mouse Button pressed: 1=Shift, 2=Ctrl, 3=Alt (Lock NZ).
Input:
Lock: 0 to move screen & access pop up menu; NZ for mouse x,y, button, up, and shift values.
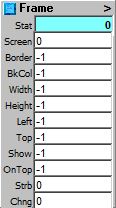
Adjust frame position, size, bkgnd color, showing status, z-order for the Canvas and the four Screens. This module gives program control of the same menu functions that are available when you right-click on the Canvas or Screen background.
Any input set to -1 will not be processed. Parameters are processed in the order they appear in the module inputs, top to bottom. You may set up multiple modules with different input parameters active (not set to -1), to effectively have, for example, one module for changing the screen size and another for positioning it.
Output:
Stat#: Status: 1 = showing, 0 = hidden.
Inputs:
Screen: Select the screen frame to control: 0 (Canvas) or Screens 1-4.
Border: Canvas width in pixels.
BkCol: Background color -1 to ignore.
Width: Width of image in frame, -1 to ignore.
Height: Height of image in frame -1 to ignore.
Left: Left position of frame, -1 to ignore.
Top: Top of frame, -1 to ignore.
Show: 1 to show frame, 0 to hide, -1 to ignore.
OnTop: 1 to place frame on top (z-order), -1 (or 0) to ignore.
Strb: Strobe to update above parameters.
Chng: Any change to update above parameters.
Load a picture from given file name.
Outputs: (none)
Inputs:
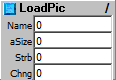
Name: File name string of picture to load. Use Text/Filename module to create file name string. All commonly used image file types supported, just give the appropiate extension (.gif, .jpg, .bmp, etc.) and the image type will be recognized and loaded.
ASize: Autosize: 0=Canvas sized to image, 1=image sized to Canvas.
Strb: Strobe to load picture.
Chng: Any change to load picture.

Save current picture.
Outputs: (none)
Inputs:
Name: File name string of picture to save. Use Text/Filename module to create file name string. All commonly used image file types supported, just give the appropiate extension (.gif, .jpg, .bmp, etc.) and the proper image file type will be saved.
Strob: Strobe to save picture.
Chng: Any change to save picture.
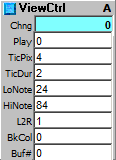
Control module for ViewNote. These two modules provide piano roll type viewing of notes as they play. You need to set up one ViewCtrl module plus any number of ViewNote modules, one for each note to display. Notes will be displayed on the Canvas by default, using the entire canvas area; however you can select any of the 4 Screens or even a portion of the Canvas or a Screen, by selecting a Buffer as the display target.
Works by painting a bar for each note at height determined by the note pitch, with length set to TicPix pixels, and at a time interval set by TicDur. On each new "tick" the image is scrolled either left or right by TicPix pixels, the edge is erased and all the active note durations are painted. This makes the display exactly real time, and a fairly exact analog to the selected MIDI Note On and Note Off messages.
Outputs:
Chng: Change at TicDur rate, for driving Screen display, not needed for Canvas (Buf# = 0).
Inputs:
Play: Nz to enable note display and scrolling.
TicPix: Pixels per system clock tick, 2-64. This affects the scroll speed by controling how long the display bar will be for each note type.
TicDur: Duration (as Clock Dur) for update interval, 0-192. Affects the scroll speed directly by controling the time interval between update "chunks."
LoNote: Lowest note value to display.
HiNote: Highest note value to display. Notes are displayed with high notes toward the top of the screen, and the bar width and vertical spacing determined by the height of the screen and the LoNote to HiNote range. So for a larger note display LoNote and HiNote values should be set as close as possible to the anticipated min and max note values.
L2R: Nz to scroll left to right, 0 for right to left.
BkCol: Background color.
Buf#: 0 to display on Canvas, or Buf# to load into image buffer for processing and/or Screen display.
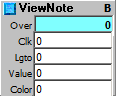
View notes as a piano roll type scroll as they are played. Use one module for each MIDI note line being played, plus one ViewCtrl module overall.
Outputs:
Over: Flags if note values are not played because they are outside the range set by LoNote and HiNote in the ViewCtrl module. Note values over send 1, notes under send -1, otherwise 0.
Inputs:
Clk: NZ to draw note graphics (OR'd with Lgto input).
Lgto: NZ to draw note graphics (OR'd with Clk input). These two inputs are exactly the same, they are logically OR'd so NZ in either will result in a note being painted. It is often handy to have one input for the clock to drive individual note ticks, and another for the Legato flag, so notes will be drawn when the clock is off but Legato is on, in the MidiVoice module.
Value: MIDI note value to display.
Color: Note color to display. When two or more notes land on the same horizontal area the color is XOR'd, so they will show up as a different color.
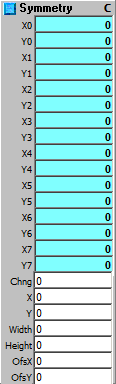
Calculate 2, 4, and 8-way symmetry from an X,Y pair. Use a single module for points, use 2 modules for lines. Optionally adds offsets to each sym pair, so you can employ multiple symmetries on a single image.
Outputs:
X0,Y0 : Original point.
X1,Y1 : 2-way (with X0, Y0) symmetry points.
X2,Y2, X3,Y3 : 4-way (with X0,Y0, X1,Y1) symmetry points.
X4,Y4 - X7,Y7: 8-way (with X0,Y0 - X3,Y3) symmetry points.
Inputs:
Chng: Any changeto update.
X, Y: Original point.
Width: Width of area of symmetry. This may be the entire image area but it need not be.
Height: Height of area of symmetry. This may be the entire image area but it need not be.
OfstX, OfstY : Added to all points after symmetry calculation.
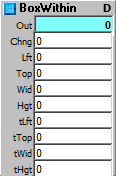
Collision detection returns true if a query (little) box is within a target (container) box. For point collision detection duplicate left and top values in the width and heighy query box inputs.
Output:
Out : True if query (little) box is within target box.
Inputs:
Chng: Any changeto update.
Lft, Top, Wid, Hgt: Left, top, width, height of query (little) box.
tLft, tTop, tWid, tHgt: Left, top, width, height of target (container) box.
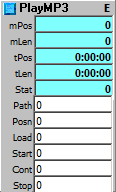
Plays an .mp3 sound file. Also plays most other Windows Media Player compatible sound files such as .wma, .wav, .mid, etc. Uses the Media Player engine but not the Media Player itself. You can play only one media file at a time per ArtWonk instance. Multiple modules are allowed, but they play only the most recently opened sound file.
Outputs:
mPos: Current position in sound file, in milliseconds.
mLen: Total length in milliseconds.
tPos: Position in sound file, as h:mm:ss string.
tLen: Total lenth as h:mm:ss string.
Stat: Status: 1=Playing, 0=Stopped.
Inputs:
Path: Sound File Name (.mp3, .wma, .wav, .mid, etc.) checks given path first, then looks in the ArtWonk folders: current patch folder, Data\Sound, Data.
Posn: Specify Start position in milliseconds.
Load: Strobe to load filename.
Start: Strobe to Start play from given position.
Cont: Strobe to Continue playing from current position.
Stop: Strobe to Stop/Pause.
Modules of a general nature such as for erasing, loading and saving images; and miscellaneous other graphics modules.
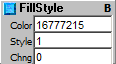
Sets fill style for enclosed drawn objects.
Outputs: (none)
Inputs:
Color: Fill color (&hBBGGRR).
Style: Fill style (0-7):
0	Solid
1	Transparent
2	Horizontal Line
3	Vertical Line
4	Downward Diagonal
5	Upward Diagonal
6	Cross
7	Diagonal Cross
Chng: Any change causes update.
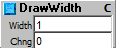
Sets line width for all drawing functions that follow. Once set, the draw width does not need to be reset unless different drawing widths are required for different drawing functions. When using different draw widths, use a separate module just before drawing functions that need a new width.
Outputs: (none)
Inputs:
Width: Draw Width 1 - 32,767 pixels.
Chng: Any change causes update.
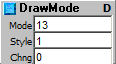
Sets drawing mode and line styles for all drawing functions that follow.
Outputs: (none)
Inputs:
Mode: Use this input value (1-16) to produce visual effects when drawing with the graphics methods. The draw function compares each pixel in the draw pattern to the corresponding pixel in the existing background and then applies bit-wise operations. For example, setting 7 (Xor Pen) uses the Xor operator to combine a draw pattern pixel with a background pixel. The exact effect of a draw Mode setting depends on the way the color of a line drawn at run time combines with colors already on the screen. Settings 1, 6, 7, 11, 13, and 16 yield the most predictable results. Use mode 3 to cleanly erase a drawn object, if you have saved the location and color of the original object.
1	Blackness.
2	Not Merge Pen — Inverse of setting 15 (MergePen).
3	Mask Not Pen — Combination of the colors common to the background color and the inverse of the pen.
4	Not Copy Pen — Inverse of setting 13 (Copy Pen).
5	Mask Pen Not — Combination of the colors common to both the pen and the inverse of the display.
6	Invert — Inverse of the display color.
7	Xor Pen — Combination of the colors in the pen and in the display color, but not in both.
8	Not Mask Pen — Inverse of setting 9 (Mask Pen).
9	Mask Pen — Combination of the colors common to both the pen and the display.
10	Not Xor Pen — Inverse of setting 7 (Xor Pen).
11	Nop — No operation — output remains unchanged. In effect, this setting turns drawing off.
12	Merge Not Pen — Combination of the display color and the inverse of the pen color.
13	Copy Pen (Default) — Color specified by the ForeColor property.
14	Merge Pen Not — Combination of the pen color and the inverse of the display color.
15	Merge Pen — Combination of the pen color and the display color.
16	Whiteness.
Style: Sets line style (0-5). If DrawWidth is set to a value greater than 1, DrawStyle settings 1 through 5 is ignored and it produces a solid line. If DrawWidth is set to 1, DrawStyle produces the following effect:
0	Transparent
1	Solid
2	Dash
3	Dot
4	Dash-Dot
5	Dash-Dot-Dot
Chng: Any change causes update.
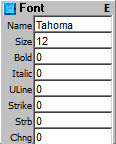
Sets font metrics for the graphics text functions.
Outputs: (none)
Inputs:
Name: Font name (text). This should be the name of a font that is currently installed on the computer.
Size: Font Size.
Bold: NZ=Font Bold.
Italic: NZ=Font Italic.
ULine: NZ=Font Underline.
Strike: NZ=Font Strikeout.
Strb: Strobe to update.
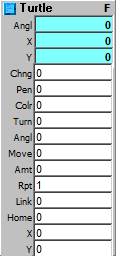
Classic Logo-type Turtle Graphics, draw by moving a "turtle" around the screen. Has the ability to link multiple turtle modules, each starting with the linked turtle's x,y & angle.
Outputs:
Angl: Current angle.
X: Current X position.
Y: Current X position.
Inputs:
Chng: Any change to update.
Pen: 0 = pen up, does not draw; 1 = pen down, draws current color.
Colr: Current color (&hBBGGRR or windows colors).
Turn: 0 = hold, 1 = turn, -1 = point north.
Turn: NZ=Font Underline.
Angl: Angle to turn, adds to current angle.
Move: 0 = hold, 1 = move.
Amt: Amount to move, in pixels.
Rpt: Number of times to repeat current operation.
Link: Link to another turtle; when linked, start with linked turtle's x,y & angle.
Home: On strobe: go to x,y, point north; -1 to just point north w/o moving.
X: X position for Home.
Y: Y position for Home.
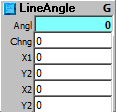
Return angle of given line endpoints x1,y1 x2,y2. Useful for combining Turtle graphics that uses angle with line and other draw modules that use endpoints.
Output:
Angl: Angle of given line.
Inputs:
Chng: Any change causes update.
X1,X2, Y1, Y2: Line endpoints to be converted to an angle.
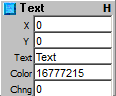
Draw text string. Use Font module to set characteristics.
Outputs: (none)
Inputs:
X, Y: Upper left coordinates for the text.
Text: Text string to draw.
Color: Text color (&hBBGGRR).
Chng: Any change causes update.
Draw a dot at X1,Y1. Use this when you want to draw a dot that will display instantly, like the other draw functions; or when you want to draw a dot that has its size, etc. set by the draw function formatting modules (FillStyle, DrawWidth, DrawMode). If you want to just draw a lot of single pixel dots, the SetPixel module is likely to be much faster.
Outputs: (none)
Inputs:
X1, Y1: Dot point location in pixels.
Color: Draw color (&hBBGGRR).
Chng: Any change causes update.
Draw a line at X1,Y1 X2,Y2.
Outputs: (none)
Inputs:
X1, Y1, X2, Y2: Line endpoints in pixels.
Color: Line draw color (&hBBGGRR).
Chng: Any change causes update.
Draw/Move Line to X, Y from previous position.
Outputs: (none)
Inputs:
X, Y: Line/move endpoint in pixels.
Pen: If NZ, the line is drawn, if 0, the position is updated but the line is not drawn.
Color: Line draw color (&hBBGGRR).
Chng: Any change causes update.
Draw a box at X1,Y1 X2,Y2.
Outputs: (none)
Inputs:
X1, Y1, X2, Y2: Opposing box corners in pixels.
Color: Box outline color (&hBBGGRR).
Chng: Any change causes update.
Draw a rounded rectangle.
Outputs: (none)
Inputs:
X1, Y1, X2, Y2: Opposing rectangle corners in pixels.
Width: Width of the ellipse used to draw the rounded corners.
Height: Height of the ellipse used to draw the rounded corners.
Color: Outline color (&hBBGGRR).
Chng: Any change causes update.
Draw a triangle at given vertices.
Outputs: (none)
Inputs:
X1, Y1 - X3, Y3: Vertices in pixels.
Color: Outline color (&hBBGGRR).
Chng: Any change causes update.
Draw a quadrilateral polygon at given vertices.
Outputs: (none)
Inputs:
X1, Y1 - X4, Y4: Vertices in pixels.
Color: Outline color (&hBBGGRR).
Chng: Any change causes update.
Draw a pentagon at given vertices.
Outputs: (none)
Inputs:
X1, Y1 - X5, Y5: Vertices in pixels.
Color: Outline color (&hBBGGRR).
Chng: Any change causes update.
Draw a hexagon at given vertices.
Outputs: (none)
Inputs:
X1, Y1 - X6, Y6: Vertices in pixels.
Color: Outline color (&hBBGGRR).
Chng: Any change causes update.
Draw a circle at given center point, of given radius.
Outputs: (none)
Inputs:
X, Y: Center point in pixels.
Radius: Radius.
Color: Outline color (&hBBGGRR).
Chng: Any change causes update.
Draw a circle at given center point, of given radius.
Outputs: (none)
Inputs:
X, Y: Center point in pixels.
Radius: Radius.
Aspct: Aspect ratio: 1.0 gives circle.
Color: Outline color (&hBBGGRR).
Chng: Any change causes update.
Draw an elliptical arc bounded within given rectangle.
Outputs: (none)
Inputs:
X1, Y1, X2, Y2: Opposing corners in pixels of bounding rectangle.
Start: Start angle degrees 0-360.
End: End angle degrees 0-36.
Color: Outline color (&hBBGGRR).
Chng: Any change causes update.
Draw a pie shaped wedge bounded within given rectangle.
Outputs: (none)
Inputs:
X1, Y1, X2, Y2: Opposing corners in pixels of bounding rectangle.
Start: Start angle degrees 0-360.
End: End angle degrees 0-36.
Color: Outline color (&hBBGGRR).
Chng: Any change causes update.
Draw a Bezier curve between end points, with two stretch points.
Outputs: (none)
Inputs:
X1, Y1: Start point of Bezier curve.
X2, Y2: 1st stretch point of Bezier curve.
X3, Y3: 2nd stretch point of Bezier curve.
X4, Y4: Start point of Bezier curve.
Color: Line color (&hBBGGRR).
Chng: Any change causes update.
These modules are for fast reading and writing of single point pixels. They bypass the normal graphics formatting overhead and are thus much faster than the standard draw functions. However SetPixel does not show up in the visible display until ShowPixels is called. This makes SetPixel inefficient for single pixel draws. If you need to draw a single pixel and immediately display it (as opposed to drawing a number of pixels before displaying them all as once), the Dot module would usually be a better choice.
Read pixel color at X,Y.
Output:
Color: Pixel color read at X,Y.
Inputs:
X, Y: Address of pixel to read.
Chng: Any change causes pixel read.
Set (write) pixel into bitmap at X,Y. Use ShowPixels to display.
Outputs: (none)
Inputs:
Color: Pixel color read at X,Y.
X, Y: Address of pixel to read.
Chng: Any change causes update.
Display any newly set pixels.
Outputs: (none)
Inputs:
Strb: Strobe to update.
Modules to add visual effects to images.
About Effects and Processes
ArtWonk v3 has greatly expanded image manipulation tools from previous versions, and has simplified their use by moving them from Function module functions to easy to use graphics modules. There are 21 Effects modules and 19 Process modules. In general Effects change the look of an image where Process changes the format, but there is a great deal of overlap and several modules could arguably be in either category. Most modules in both groups work on the entire image by default, but can work on a partial rectangular area or on an arbitrary non rectangular region by using the SetArea and Region modules as source for the pArea inputs. Use the SetArea module to specify a rectangular area of the image to process; use the Region module to specify an arbitrary non rectangular area.
Image processing is a relitively slow process, as it is usually a pixel by pixel manipulation. For best real time results it is usually better to at least partially pre process your images and store them as either Buffers in memory or as stored image files. There are Text modules such as StrGenKey and CombineFN that help you create frame stack files for rapid access, and GetFNames to make the image files available simply by indexing them. These tools were developed in consultation with algorithmic artist Prof. Jamy Sheridan of the Maryland Institute College of Art, who has done extensive work with processing very large stacks of image files (in the tens of thousands) with ArtWonk.
Blend each pixel in the image with its neighboring pixels.
Outputs: (none)
Inputs:
Chng: Any change to update.
Amt: Amount to Blend in percent (0-100).
pArea: 0 = process full image; connect to SetArea or Region module to process partial image.
Adjust Brightness values (luminance in the HSL color space or RGB values in the RGB color space).
Outputs: (none)
Inputs:
Chng: Any change to update.
Amt: Ammount: -100 to +100, positive values brighten, negative values darken.
pArea: 0 = process full image; connect to SetArea or Region module to process partial image.
Autocontrast uniformly adjusts the contrast in the images.
Outputs: (none)
Inputs:
Chng: Any change to update.
pArea: 0 = process full image; connect to SetArea or Region module to process partial image.
Adjust the contrast of the image.
Outputs: (none)
Inputs:
Chng: Any change to update.
Amt: Ammount: -100 to +100, positive values increase contrast, negative values decreas.
pArea: 0 = process full image; connect to SetArea or Region module to process partial image.
Parabolic transform modifies the brightness of each pixel in the image.
Outputs: (none)
Inputs:
Chng: Any change to update.
Type: Type of parabolic transform to perform: 0 = convex, 1 = concave.
pArea: 0 = process full image; connect to SetArea or Region module to process partial image.
Adjust contrast without changing the brightness range of the image.
Outputs: (none)
Inputs:
Chng: Any change to update.
pArea: 0 = process full image; connect to SetArea or Region module to process partial image.
Adjust gamma value, the ratio of input vs. output brightness.
Outputs: (none)
Inputs:
Chng: Any change to update.
Amt: Ammount: 1-100 (decimal fractions OK), 10.0 = no change, below 10.0 darkens, above 10.0 brightens).
pArea: 0 = process full image; connect to SetArea or Region module to process partial image.
Blur the image by averaging each pixel with each of its neighboring pixels.
Outputs: (none)
Inputs:
Chng: Any change to update.
pArea: 0 = process full image; connect to SetArea or Region module to process partial image.
Create a motion blur of the image.
Outputs: (none)
Inputs:
Chng: Any change to update.
Intns: Intensity of the motion blur (1-25).
hVelo: Horizontal velocity of the motion blur (-10 to 10); negative for right to left, positive for left to right.
vVelo: Vertical velocity of the motion blur (-10 to 10); negative for bottom to top; positive for top to bottom.
pArea: 0 = process full image; connect to SetArea or Region module to process partial image.
Diffuse the image by replacing each pixel with a randomly selected neighboring pixel.
Outputs: (none)
Inputs:
Chng: Any change to update.
pArea: 0 = process full image; connect to SetArea or Region module to process partial image.

Erode the image using a 3x3 minimum filter.
Outputs: (none)
Inputs:
Chng: Any change to update.
pArea: 0 = process full image; connect to SetArea or Region module to process partial image.
Give the image a pixilated look.
Outputs: (none)
Inputs:
Chng: Any change to update.
Amt: Amount of pixilation, block size (0-63).
pArea: 0 = process full image; connect to SetArea or Region module to process partial image.
Reduce the number of colors in the image.
Outputs: (none)
Inputs:
Chng: Any change to update.
RGB: Number of colors (2-255) for each R, G, B color channel.
pArea: 0 = process full image; connect to SetArea or Region module to process partial image.
Solarize the colors in the image by negating the colors beyond the threshold value.
Outputs: (none)
Inputs:
Chng: Any change to update.
Amt: Amount for solarization threshold (0-255, lower is more).
pArea: 0 = process full image; connect to SetArea or Region module to process partial image.
Add noise to the image.
Outputs: (none)
Inputs:
Chng: Any change to update.
Freq: Frequency (1 to 20); larger values produce more frequent noise.
Intns: Intensity or harshness (1 to 255); larger values produce more intense noise.
pArea: 0 = process full image; connect to SetArea or Region module to process partial image.
Dilate the image using a 3x3 maximum filter (enhances / fills in divets in black letters and lines).
Outputs: (none)
Inputs:
Chng: Any change to update.
pArea: 0 = process full image; connect to SetArea or Region module to process partial image.
Emboss the image, giving it a raised metallic-like or embroidered look.
Outputs: (none)
Inputs:
Chng: Any change to update.
pArea: 0 = process full image; connect to SetArea or Region module to process partial image.
Enhance the edges in the image to give it an outline effect.
Outputs: (none)
Inputs:
Chng: Any change to update.
pArea: 0 = process full image; connect to SetArea or Region module to process partial image.
Soften the image by applying a low pass 3 x 3 convolution filter.
Outputs: (none)
Inputs:
Chng: Any change to update.
Amt: Amount to filter (1-10).
pArea: 0 = process full image; connect to SetArea or Region module to process partial image.
Sharpen the image by applying a high pass 3 x 3 convolution filter.
Outputs: (none)
Inputs:
Chng: Any change to update.
Amt: Amount to filter (1-10).
pArea: 0 = process full image; connect to SetArea or Region module to process partial image.
Add translucent bevels to the edges of the image to give it the appearance of a 3D button.
Outputs: (none)
Inputs:
Chng: Any change to update.
Style: Button style: 0 = insert, 1 = raised.
Width: Width of the bevels (0 to 32767).
Intns: Intensity of the bevels (1 to 100); higher for more opaque, lower for more translucent.
pArea: 0 = process full image; connect to SetArea or Region module to process partial image.
Modules to change image format and layout.
Connect to graphics module 'pArea' input to specify an area of the image to process or fetch.
Output:
Area: Connect to 'pArea' input of graphics module to specify processing area, or to 'sArea' to crop source.
Inputs:
Width: Width of area to process or fetch (0=process full image).
Height: Height of area to process or fetch (0=process full image).
OfsX: Offset X (left) of area to process or fetch.
OfsY: Offset Y (top) of area to process or fetch.
Create or use an image region for graphics processing. Click on the blue-label property button on the upper right of the module to change or examine the defined region points. You can set region x,y array points with copy and paste from standard ArtWonk arrays and sequencer arrays.
Output:
Pnts: Total number of points defined.
Flip the image from top to bottom.
Outputs: (none)
Inputs:
Chng: Any change to update.
pArea: 0 = process full image; connect to SetArea or Region module to process partial image.
Rotate image 180 degrees, then flip it to create a mirror image.
Outputs: (none)
Inputs:
Chng: Any change to update.
pArea: 0 = process full image; connect to SetArea or Region module to process partial image.

Rotate the image.
Outputs: (none)
Inputs:
Chng: Any change to update.
Amt: Ammount in degrees: -360 to +360, angle by which the image is rotated.
pArea: 0 = process full image; connect to SetArea or Region module to process partial image.
Crop the image to the specified size.
Outputs: (none)
Inputs:
Chng: Any change to update.
aSize: Autosize: 0=buffer sized to image, 1=image sized to buffer.
Width: Width of area image to crop (fails if Width + OfstX > image Width.
Height: Height of area to crop (fails if Height + OfstX > image Height.
OfsX: Offset X (left) of area in image to crop.
OfsY: Offset Y (top) of area in image to crop.
Resize the image according to given quality/speed algorithm.
Outputs: (none)
Inputs:
Chng: Any change to update.
Qual: Quality: 0 = lowest but fastest speed; 1 = medium; 2 = highest but slowest speed.
Width: Resize Width (if 0 use Canvas width).
Height: Resize Height (if 0 use Canvas height).
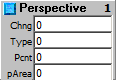
Change the aspect for each row or column of pixels in the image.
Outputs: (none)
Inputs:
Chng: Any change to update.
Type: Type (0-3) of perspective filter: 0=Top to Bottom, 1=Bot to Top, 2=Left to Right, 3=Right to Left.
Pcnt: Percentage of filter to apply (0-100, lower is more).
pArea: 0 = process full image; connect to SetArea or Region module to process partial image.
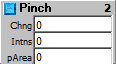
Transform the image by making it appear as if it were pinched in the center.
Outputs: (none)
Inputs:
Chng: Any change to update.
Intns: Intensity of pinch effect (-100 to 100): positive to pinch in center, negative to stretch from the center.
pArea: 0 = process full image; connect to SetArea or Region module to process partial image.

Perform a polynomial warp on the image by re-sizing and warping it based on 4 bounding points within the image.
Outputs: (none)
Inputs:
Chng: Any change to update.
X1-X4: The vertical bounding coordinates.
Y1-Y4: The horizontal bounding coordinates.
pArea: 0 = process full image; connect to SetArea or Region module to process partial image.
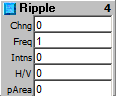
Produce a wave-like effect on the image.
Outputs: (none)
Inputs:
Chng: Any change to update.
Freq: Frequency of the ripples (1 to 100, larger values for more ripples).
Intns: Intensity of the ripples (-100 to 100, larger values for more intense ripples).
H/V: Direction of the ripples: 0=horizontal, 1=vertical, 2=both).
pArea: 0 = process full image; connect to SetArea or Region module to process partial image.
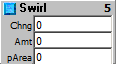
Transform the image by creating a swirling pattern from the center.
Outputs: (none)
Inputs:
Chng: Any change to update.
Amt: Amount of swirl in degrees (0-360).
pArea: 0 = process full image; connect to SetArea or Region module to process partial image.
Divide the image into square blocks and rotate each block.
Outputs: (none)
Inputs:
Chng: Any change to update.
Size: Size of the blocks to be rotated (2-63).
RotA: Block rotation angle: 0=90 degrees, 1=180 degrees, 2=270 degrees, 3=Random.
pArea: 0 = process full image; connect to SetArea or Region module to process partial image.
Adjust color in either Red, Green, Blue or Hue, Saturation, Luminance color space.
Outputs: (none)
Inputs:
Chng: Any change to update.
Space: Color space: 0 = RGB (-255 to 255), 1 = HSL (-100 to 100).
R/H: Red (-255 to 255) or Hue (-100 to 100).
G/S: Green (-255 to 255) or Saturtion (-100 to 100).
B/L: Blue (-255 to 255) or Luminance (-100 to 100).
pArea: 0 = process full image; connect to SetArea or Region module to process partial image.
Replace a range of colors in the image.
Outputs: (none)
Inputs:
Chng: Any change to update.
From: Beginning color range (&hBBGGRR).
To: Ending color range (&hBBGGRR).
New: New replacement color (&hBBGGRR).
pArea: 0 = process full image; connect to SetArea or Region module to process partial image.
Create a color negative of the image.
Outputs: (none)
Inputs:
Chng: Any change to update.
pArea: 0 = process full image; connect to SetArea or Region module to process partial image.
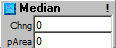
Use a 3x3 median filter to reduce noise in the image.
Outputs: (none)
Inputs:
Chng: Any change to update.
pArea: 0 = process full image; connect to SetArea or Region module to process partial image.
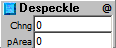
Filter the image using a filter that attempts to eliminate noise.
Outputs: (none)
Inputs:
Chng: Any change to update.
pArea: 0 = process full image; connect to SetArea or Region module to process partial image.
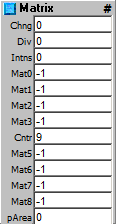
Apply a custom 3x3 convolution matrix filter to the image, which provides a means to create custom convolution filters. Uses a 9 element array (Mat0-Mat8) of values from -32767 to 32767 that determins the 3x3 pixel processing grid. The default matrix values will produce a sharpen filter:
Mat0 = -1
Mat1 = -1
Mat2 = -1
Mat3 = -1
Cntr = 9
Mat5 = -1
Mat6 = -1
Mat7 = -1
Mat8 = -1
The convolution matrix filter alters each pixel's color based on its current color and the colors of any neighboring pixels. The array of filter matrix values are coefficients. When a pixel is processed, its color value is multiplied by the coefficient in the array's center and any pixels within the 3x3 grid are multiplied by the corresponding coefficients in the array. The sum of the products becomes the target pixel's new value.
Outputs: (none)
Inputs:
Chng: Any change to update.
Mat0-Mat3: Matrix grid pixel coefficients (-32767 to 32767).
Cntr: Matrix center grid pixel coefficient (-32767 to 32767).
Mat5-Mat8:Matrix grid pixel coefficients (-32767 to 32767.
pArea: 0 = process full image; connect to SetArea or Region module to process partial image.
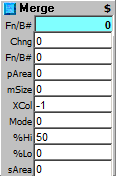
Merge a source image into the current image, with a wide range of merge effects.
Output:
Fn/B#: Source file name or buffer number used.
Inputs:
Chng: Any change to display merge.
Fn/B#: Source image: connect to Buffer Buf# output, or give a text file name.
pArea: 0 = process full image; connect to SetArea or Region module to process partial image.
mSize: Merge size: 0=crop, 1=Resize Area to Image, 2=Resize Image to Area, 3=Tile Image to Area.
XCol: Set to color (&hBBGGRR) that will be transparent, -1 for no transparency.
Mode: Merge mode: (0-13) 0=normal merge, 5=superimpose (Hi% is blend intensity); see table below for other modes.
%Hi: Blend intensity (mode 6-13), or the superimpose intensity (when mode = 5). Range: 0 - 100 (percent)
%Lo: Blend intensity (mode 6-13). Range: 0 - 100 (percent)
sArea: 0 = use entire source image; connect to SetArea or Region module for partial source image.
Merge Modes
Normal (0) — Pixels are merged with the existing image.
IfDarker (1) — Merges only pixels darker than the ones in
the existing image.
IfLighter (2) — Merges only pixels lighter than the ones
in the existing image.
Additive (3) — Pixel values are added to the pixels in
the existing image.
Subtractive (4) — Pixel values are subtracted from the
pixels in the existing image.
Superimpose (5) — The image is superimposed onto the
existing image. high merge percentage determines the intensity of the
superimposition.
Superimpose_LeftToRight (6) — The image is superimposed
onto the existing image. This produces a fading effect where the left side
of the superimposed image is lighter than the right side. The high or low
merge percentage determines the intensity range of the superimposition.
Superimpose_RightToLeft (7) — The image is superimposed
onto the existing image. This produces a fading effect where the right
side of the superimposed image is lighter than the left side. The high or
low merge percentage determines the intensity range of the
superimposition.
Superimpose_VerticalToCenter (8) — The image is
superimposed onto the existing image. This produces a fading effect where
the right and left sides of the superimposed image are lighter than the
center. Merge percentage determines intensity range of the
superimposition.
Superimpose_VerticalFromCenter (9) — Superimpose Vertical
from Center — The image is superimposed onto the existing image. This
produces a fading effect where the center of the superimposed image is
lighter than the right and left sides. Merge percentage determines
intensity of superimposition.
Superimpose_TopToBottom (10) — The image is superimposed
onto the existing image. This produces a fading effect where the top of
the superimposed image is lighter than the bottom. Merge percentage
determines intensity of superimposition.
Superimpose_BottomToTop (11) — The image is superimposed
onto the existing image. This produces a fading effect where the bottom of
the superimposed image is lighter than the top. Here too, merge merge
percentage determines intensity of superimposition.
Superimpose_HorizFromCenter (12) — The image is
superimposed onto the existing image. This produces a fading effect where
the top and bottom of the superimposed image are lighter than the center.
Merge merge percentage determines the intensity range of the
superimposition.
Superimpose_HorizToCenter (13) — The image is
superimposed onto the existing image. This produces a fading effect where
the center of the superimposed image is lighter than the top and bottom.
High or low merge percentage determines the intensity range of the
superimposition.
For speed and flexibility, ArtWonk graphics modules operate directly on the memory representation of your images rather than on the visual display. These memory-images are called Device Independent Bitmaps, or DIBs, and the ArtWonk containers that manipulate them are called Buffers. You can have any number of Buffers, up to the limits of your computer's memory. In most modern computers this will amount to hundreds of Buffers before the operating system needs to use disk memory cashing and starts bogging down.
Additionally, when you load an image directly from an image file, most graphics modules will use the DIB associated with that image, which becomes a sort of shadow Buffer for the module. Thus, you can elect to operate directly on image .gif, .jpg, etc., files.
To display the image contained in a Buffer, ArtWonk uses the 4 Screens, which act much like movie screens. They allow very fast display of an image contained in a memory Buffer to the visible Screen.
The Canvas, which is the default target for image modules, is actually a combination of a Buffer and a Screen. This makes it simple to use the image modules without needing to work with Buffers and Screens. With the Canvas, it just happens automatically.
Since the Canvas is both a Screen (Screen0) and a Buffer (usually Buffer #0), you have the option of drawing and processing your graphic on the Canvas, then from time to time, projecting it onto any of the Screens. This is done by simply plugging the Canvas Buf# output into the Screen Fn/B# input, then firing the Screen Chng input whenever you want it to capture the Canvas image. There is a great deal you can do with just this method, without ever having to create additional Buffers.
When you wish to process multiple images you will need to create some Buffers. There are two ways to create Buffers: one at a time with the Buffer module, and in an array of multiple Buffers with the BufArray module.
In order to tell ArtWonk graphics modules which Buffer to work on, you will need to use the ActiveBuf module. This module sets the active buffer for all graphics operations that follow it in priority order. Thus, you will almost always need to set up two or more ActiveBuf modules. One probably just before the Canvas to enable that again, and the others prior to processing the other Buffers. Keeping in mind the Canvas is also a Buffer and it can be used just like any other Buffer, normal multi Buffer module priority order would be:
ActiveBuf - Buffer - graphics modules ... ActiveBuf - Buffer - graphics modules ... etc.
It is important to realize that Buffer numbers are handles, not actual index numbers. Just as with ArtWonk Arrays, the handles are subject to change any time ArtWonk's memory management housekeeping decides to reorder them. Thus it is essential that you do not use Buffer numbers explicitly. Always connect with the Buf# output of the Buffer module. This includes the Canvas module, which is usually set to 0 but is also subject to change.
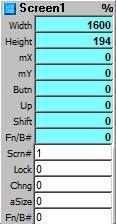
Display images and read mouse activity on the floating view screens. Unlike the Canvas, Screens are not automatically connected to Buffers. In order to display an image you will need to connect either a Buffer Buf# output or a text file name at the Fn/B# input.
Outputs:
Width: Screen width in pixels.
Height: Screen height in pixels.
mX: Mouse X when over screen and Lock=NZ.
mY: Mouse Y when over screen and Lock=NZ.
Butn: Mouse Button pressed, 1=Left, 2=Right 4=Middle (Lock NZ).
Up: Mouse Button up (Lock NZ).
Shift: Shift keys when Mouse Button pressed: 1=Shift, 2=Ctrl, 3=Alt (Lock NZ).
Fn/B#: Source file name or buffer number used.
Inputs:
Scrn#: 1=Screen1, 2=Screen2, 3=Screen3, 4=Screen4. While there are only the 4 Screens, you can create any number of Screen modules, and it is safe to duplicate them in Macros or Cut/Paste module stacks. Of course, having multiple Screen modules pointing to the same Screen may cause unexpected results such as conflicting Lock states or displaying an image for only a fraction of a second followed by another image, etc. for each of the active Screen modules. So we recommend having only one Screen module per Screen.
Lock: 0 to move screen & access pop up menu; NZ for mouse x,y, button, up, and shift values.
Chng: Any change displays buffer or file on screen.
aSize: Autosize: 0=screen sized to image, 1=image sized to screen.
Fn/B#: Source display image: connect to Buffer Buf# output, or give a text file name.
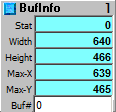
Get image info from given buffer # without changing active buffer.
Outputs
Stat: Status: 0 if error, Buf# if OK
Width: Width in pixels
Height: Height in pixels
Max-X: Maximum X (horizontal) dimension
Max-Y: Maximum Y (vertical) dimension
Inputs
Buf#: Buffer Number to query
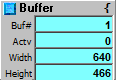
Create and access an image buffer. This is the container for the graphics image pixels, which is used as source for graphics module operations.
Outputs:
Buf#: Buffer handle. These values are handled by ArtWonk's memory management housekeeping and should only be used by plugging the module Buf# output into whatever modules need the value, never type the value in directly because it will likely change.
Actv: Indicates whether graphics modules can write to the Buffer. 1=Active, 0=Inactive. Be sure an ActivBuf module precedes the Buffer module in the module calcualtion priority, in order to enable it as a source for the graphics modules that follow.
Width: Buffer width in pixels.
Height: Buffer height in pixels.
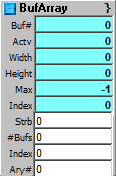
Access, create or reset an array of image buffers. Once the array of Buffers is created, they are accessed by the Index input. You can create Buffers by giving a number to the #Bufs input, or you can automatically create and load them with a directory of images by connecting the GetFNames module output to the #Bufs input.
Outputs:
Buf#: Buffer handle, as addressed by Index. These values are handled by ArtWonk's memory management housekeeping and should only be used by plugging the module Buf# output into whatever modules need the value, never type the value in directly because it will likely change.
Actv: Indicates whether graphics modules can write to the indexed Buffer. 1=Active, 0=Inactive. Be sure an ActivBuf module precedes the BufArray module in the module calcualtion priority, in order to enable it as a source for the graphics modules that follow.
Width: Buffer width in pixels.
Height: Buffer height in pixels.
Max: Max array index (#buffers -1).
Index: Index address of buffer (0-Max). Do not confuse the Index with the Buf# it addresses. Index values are simply pointers to the Buffer handles.
Inputs:
Strb: Strobe to create buffer array; erases any existing buffers.
#Bufs: Number of buffers to create (or connect with GetFNames for direct load).
Index: Autosize: 0=screen sized to image, 1=image sized to screen
Ary#: If > 0, the given Array will contain the Buffer handles. This is optional; it is useful if you need to have simultainous access to the Buffer handles (the Index only gives access to one at a time). Array values are accurate only if Max is >0.
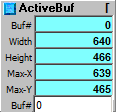
Mark a buffer Active, so it can be modified by draw, effects, etc. modules (only one buffer is active at a time).
There are two typical ways to use this module. One is to precede each Buffer module with ActiveBuf, which will make the Buffer active for all graphics modules in the priority chain until another ActiveBuf is encountered.
The other way to use ActiveBuf is to switch among Buffer handles. This will cause all graphics modules to process whatever Buffer is switched on (Active), until another ActiveBuf module is encountered, or until a different Buffer handle is fed to the Buf# input.
Outputs:
Buf#: Currently Active Buffer.
Width: Active Buffer width in pixels.
Height: Active Buffer height in pixels.
Max-X: Maximum X (horizontal) dimension.
Max-Y: Maximum Y (vertical) dimension.
Input:
Buf#: Buffer handle to Make Active.

Set buffer size and background color.
Outputs: (none)
Inputs:
Chng: Any change to reset size and background color.
Buf#: Handle of Buffer to resize or flood.
BkCol: Color(&hBBGGRR or windows colors) for background fill.
Width: Value to set screen width (ignored if either width or height <= 0).
Height: Value to set screen height (ignored if either width or height <= 0).
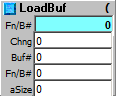
Load a Buffer from another Buffer handle or an image file name.
Output:
Fn/B#: Source Buf# or file name loaded
Inputs:
Chng: Any change to load image.
Buf#: Destination Buf# to be loaded.
Fn/B#: File name to load, or source Buf#, or -1 to -4 for Screen 1-4.
aSize: Autosize: 0=buffer sized to image, 1=image sized to buffer.
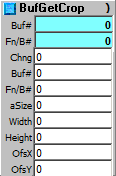
Copy crop of source image or buffer into a destination buffer. Use to copy only part of a source image into a destination Buffer.
Outputs:
Buf#: Destination Buf# holding cropped image
Fn/B#: Source file name or buffer number holding full image
Inputs:
Chng: Any change to load destination Buf# with cropped image from source.
Buf#: Destination Buf# to receive cropped image.
Fn/B#: Source file name or buffer number to get image crop from.
aSize: Autosize: 0=destination buffer sized to cropped image, 1=cropped image sized to destination buffer.
Width: Width of area image to crop (fails if Width + OfstX > source Width).
Height: Height of area to crop (fails if Height + OfstX > source Height).
OfsX: Offset X (left) of area in source image to crop.
OfsY: Offset Y (top) of area in source image to crop.
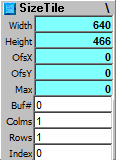
Return Width, Height, OfstX, OfstY values for given Buffer and tiles wanted. This module does the math for BufGetCrop. If you want to section a source image into tiles, give it the source Buf#, and the number of columns and rows you want, and the module returns the tile information you need for the crop.
Outputs:
Width: Tile Width.
Height: Tile Height.
OfsX: Tile Offset X (left).
OfsY: Tile Offset Y (top).
Max: Max Index (Columns x Rows -1).
Inputs:
Buf#: Buffer number to calculate tiles for.
Colms: Columns wanted.
Rows: Rows wanted.
Index: Tile index going left to right, top to bottom.
ArtWonk is Copyright © 2003-2014 by John Dunn and Algorithmic Arts. All Rights Reserved.